Best Composting Method
1. Introduction: Best Composting Methods
Best composting methods is an eco-friendly guide with efficient ways to recycle organic waste into nutrient-rich soil for your garden. Best Composting Method delves into various non-commercial methods of composting, considering time, temperature, moisture, the use of fertilizers or starters, and techniques to accelerate the process.
2.Understanding Composting Methods
Composting is an invaluable practice for gardeners, turning kitchen scraps and yard waste into nutrient-rich soil. Expanding on the methods of composting, each with its unique characteristics, can provide a clearer understanding for those looking to start or improve their composting efforts.
2.1. Traditional Bin Composting
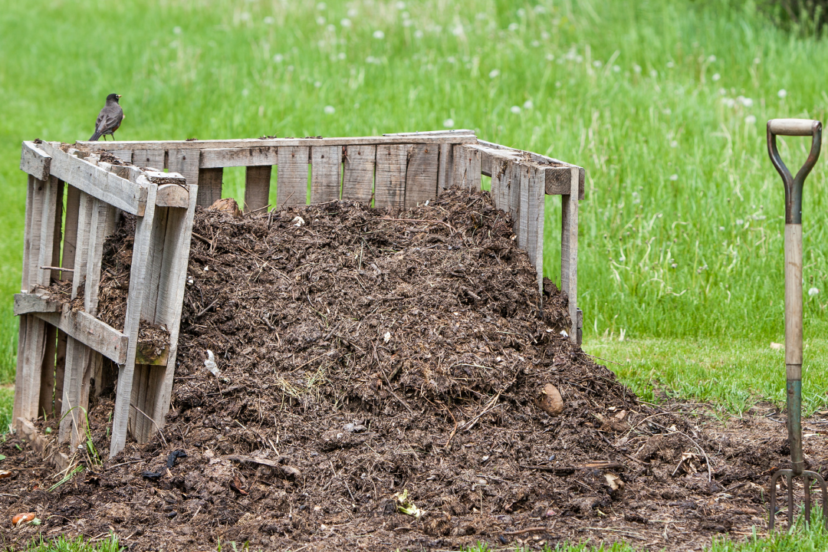
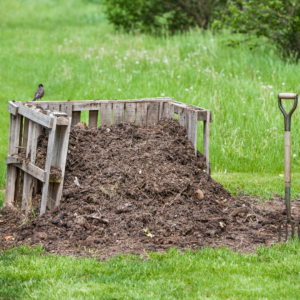
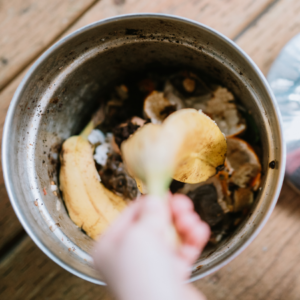
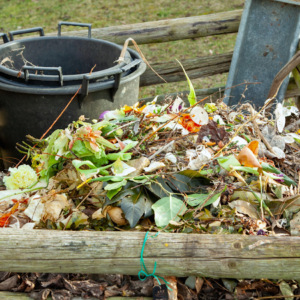
Traditional bin composting is perhaps the most common and accessible method. It involves creating layers of green and brown materials in a bin. Green materials are nitrogen-rich and include items like kitchen scraps, coffee grounds, and grass clippings. Brown materials are carbon-rich, such as dried leaves, straw, and shredded newspaper. The key to successful bin composting lies in maintaining a balance between these two types of materials, typically aiming for a ratio of about 2:1 of browns to greens. This balance ensures a proper environment for microorganisms to thrive and break down the material. Regular turning of the compost helps to aerate the pile, speeding up the decomposition process. This method typically takes 3-6 months to produce usable compost.
2.2. Trench Composting
Trench composting is a direct and straightforward method. It involves digging a trench in the garden and filling it with organic waste. Over time, usually over the course of a few months to a year, the materials decompose directly in the soil. This method is particularly beneficial as it enriches the soil in the area where the trench is located, making it ideal for future planting. It’s also a low-maintenance method since it doesn’t require turning or monitoring temperatures.
2.3. Vermicomposting
Vermicomposting uses worms, typically red wigglers, to break down organic matter. This method is excellent for indoor composting because it is odorless and compact. Worms consume the organic material and produce castings, which are extremely rich in nutrients. The process involves setting up a bin with bedding for the worms (such as shredded newspaper or cardboard) and adding your kitchen scraps. The worms do the rest, creating compost in as little as 3-4 months. It’s important to maintain the right moisture level and avoid overfeeding the worms.
2.4. Bokashi Composting
Bokashi composting is a unique method that involves fermenting kitchen waste, including items typically not recommended for traditional composting like meat and dairy. This method uses a special bran inoculated with beneficial microbes that break down the waste in an anaerobic process. The waste is sealed in a container where it ferments for about two weeks. After fermentation, the material is typically buried in the garden soil or added to a traditional compost bin to finish decomposing. This method is fast, efficient, and ideal for those with limited outdoor space.
2.5. Composting Tumblers
Composting tumblers are a modern take on traditional composting, ideal for home gardeners who want a more contained and efficient system. Tumblers are elevated, sealed barrels that can be turned easily to mix the compost. This design allows for better aeration and faster decomposition, often producing compost in as little as two months. Tumblers are perfect for those who prefer a neater appearance and wish to keep pests away. They work best when filled with a balanced mix of green and brown materials and turned regularly to maintain oxygen flow and even decomposition.
Each of these composting methods offers distinct advantages, catering to different needs and preferences. Whether you have a small indoor space or a large outdoor garden, there is a composting method that can fit into your gardening practice, turning waste into a valuable resource for plant growth.
3. Time Frame for Composting Methods
The duration it takes for compost to mature can significantly vary depending on the method used, the balance of materials, environmental conditions, and maintenance practices. Here’s an updated overview including the composting tumbler:
3.1. Bin Composting:
Generally takes about 3-6 months. The speed can be influenced by factors like the ratio of green to brown materials, the size of the compost pieces, and how frequently the compost is turned.
3.2. Trench Composting:
This method typically requires a longer period, ranging from 3 to 12 months. The decomposition happens directly in the soil, and the timeline can be affected by soil conditions, the type of organic material used, and environmental factors.
3.3. Vermicomposting:
Usually a quicker process, vermicomposting can produce compost in about 3-4 months. The efficiency depends on the number of worms, the type of food scraps provided, and the conditions within the composting bin.
3.4. Bokashi Composting:
This method is relatively fast, requiring 2 weeks for the initial fermentation process in the sealed container. After this, the material needs to be buried in soil or added to another compost system, where it takes an additional 2-4 weeks to fully integrate and decompose.
3.5. Composting Tumblers:
Tumblers can significantly expedite the composting process, often producing finished compost in 2-3 months. The enclosed, rotating design enhances aeration and evenly distributes heat and microbes. Regular turning and maintaining a proper balance of materials are crucial for achieving this faster decomposition time.
Each of these methods has its unique timeframe, and understanding these can help gardeners choose the method that best fits their schedule and gardening needs.
4. Temperature: The Heat Factor in Composting
The temperature within a compost pile is a critical factor that influences the rate of decomposition, the effectiveness in killing weed seeds, and the overall health of the compost. The optimal temperature range for composting is between 135°F and 160°F (57°C – 71°C). This heat is not externally applied but is internally generated by the microbial activity as they break down organic matter.
4.1. Importance of Temperature in Weed Seed Destruction
To effectively kill weed seeds that may be present in the compost, it’s essential that the compost reaches a sustained high temperature. Most weed seeds are killed when exposed to temperatures of about 140°F (60°C) for a period of several days. This high temperature is usually achieved in the active, or ‘hot’ composting phase, which is most effective in larger piles where the heat generated by microbial activity is sufficient to permeate the entire mass.
4.2. Monitoring Compost Temperature
Monitoring the temperature of your compost pile is crucial for ensuring optimal composting conditions and for weed seed eradication. Here are some practical ways to monitor the temperature:
a. Compost Thermometer:
The most direct way to monitor the temperature is by using a long-stemmed compost thermometer. These thermometers are specifically designed for compost piles and can be inserted into the center of the pile to get an accurate reading.
b. Visual and Sensory Indicators:
Observing the steam rising from the compost pile on colder days can be a good indicator of sufficient heat. Additionally, if the pile appears to be decomposing but is not warm to the touch, it may not be reaching the optimal temperature.
c. Turning the Pile:
Regularly turning the compost can help distribute heat and microbes throughout the pile, aiding in maintaining a consistent temperature. When the center of the pile is hot but the outer layers are cooler, turning can help bring un-decomposed materials into the hotter central area.
4.3. Temperature Maintenance Strategies
a. Size of the Pile:
A larger pile can better retain heat. Ideally, a compost pile should be at least 3 feet high and wide to generate enough heat.
b. Balancing Materials:
A proper balance of green (nitrogen-rich) and brown (carbon-rich) materials can foster an environment conducive to heat-generating microbial activity.
c. Moisture Control:
Too much moisture can cool the pile and slow decomposition, while too little can inhibit microbial activity. Maintaining a damp (not wet) consistency is optimal.
d. Insulation:
In colder climates, insulating the pile with straw bales or similar materials can help retain heat.
By carefully managing the temperature of your compost pile and ensuring it reaches the temperatures needed to kill weed seeds, you can create a more effective and efficient composting system. This not only accelerates the composting process but also ensures a higher quality end product for your gardening needs.
5. Moisture Considerations in Best Composting Methods
Moisture is a vital component in the composting process, acting as a catalyst for microbial activity. The ideal moisture content for compost varies slightly between methods, but generally, the material should feel as damp as a wrung-out sponge, which equates to a moisture content of approximately 40-60%. Here’s a closer look at moisture levels for each composting method and practical ways to measure or estimate moisture content.
5.1. Moisture Levels for Different Composting Methods
a. Traditional Bin Composting:
The ideal moisture content is around 50-60%. This level supports aerobic decomposition, which is crucial for this method. Too much moisture can lead to anaerobic conditions, causing odors and slowing down the process.
b. Trench Composting:
Moisture levels can be a bit higher, around 60-70%, due to direct soil contact which regulates moisture naturally. The soil helps drain excess water and absorb it when the compost is too dry.
Vermicomposting: This method requires a moisture content of about 70-80% as worms need a moist environment. However, excess water should be avoided as it can drown the worms and create anaerobic conditions.
c. Bokashi Composting:
Since this is an anaerobic process, a slightly higher moisture content is acceptable, around 60-70%. The sealed container helps maintain the necessary moisture levels.
d. Composting Tumblers:
Aim for a moisture content of 50-60%. Good ventilation in tumblers prevents excess moisture build-up, reducing the risk of anaerobic conditions.
5.2. Measuring and Estimating Moisture Content in Best Composting Methods
a. The Squeeze Test:
The simplest way to estimate moisture is the squeeze test. Grab a handful of compost and squeeze it. If a few drops of water come out, it’s at the right moisture level. If it’s dripping wet, it’s too moist, and if it feels dry, it needs more water.
b. Moisture Meters:
For a more accurate reading, use a moisture meter. These devices are inserted into the compost and give a digital reading of the moisture level.
c. Observation and Smell:
A well-moisturized compost pile should have an earthy smell. If it smells rotten or like ammonia, it might be too wet. Visually, if you see standing water or the compost looks soggy, it’s too wet. Conversely, a dry, dusty appearance indicates it’s too dry.
d. Weight and Consistency:
A compost pile with the correct moisture level will feel heavy but not waterlogged. The material should clump together when squeezed but break apart easily.
5.3. Adjusting Moisture Levels in Best Composting Methods
a. To Increase Moisture:
Add green materials, like kitchen scraps or fresh grass clippings, or simply sprinkle water over the pile.
b. To Decrease Moisture:
Add brown materials, like dry leaves or straw, which absorb excess moisture and create air pockets aiding aeration.
Balancing the moisture content in your compost pile is essential for creating a conducive environment for decomposition. Regular monitoring and adjustments can lead to a more efficient and effective composting process, producing high-quality compost for your garden.
6. Enhancing Compost with Starters and Fertilizers
To enhance the composting process and the quality of the final compost, gardeners can use compost starters and organic fertilizers. These additives introduce beneficial microbes and nutrients, respectively, accelerating decomposition and enriching the compost. Here’s an expanded view, including commercially available products in North America and suggested quantities or proportions.
6.1. Compost Starters
Compost starters, also known as accelerators, are designed to jumpstart the decomposition process by introducing a concentrated dose of microorganisms. Here are some popular options:
Espoma Organic Traditions Compost Starter: This is a blend of bio-organic microbes that helps break down a wide range of organic materials. Suggested usage is 1 cup per 16 square feet of compost material.
a. Jobe’s Organics Compost Starter:
This product contains Archaea, a unique beneficial microorganism. For use, sprinkle 2 cups of the starter evenly over each cubic yard of compost material.
b. Ringer Compost Plus:
This compost starter contains a mix of microorganisms and nutrients. Apply 2 cups per cubic yard of compost pile.
c. Garden Soil:
For a more natural approach, garden soil can be an effective starter. It introduces native microorganisms into the compost. Sprinkle a few shovels of garden soil into the compost bin or pile.
6.2. Fertilizers
Adding a small amount of organic fertilizer can provide additional nutrients to the compost, creating a richer end product. Here are some options:
a. Down To Earth All Natural Seabird Guano:
Rich in nitrogen and phosphorus, this can be sprinkled lightly over the compost pile, using about 1 cup per 25 square feet of compost.
b. Neptune’s Harvest Fish & Seaweed Fertilizer:
This liquid fertilizer can be diluted with water (1 ounce per gallon) and sprayed over the compost pile to add nutrients.
c. Blood Meal:
A high-nitrogen option, blood meal can be added to compost in small amounts, typically a handful per square yard of compost, to boost nitrogen content.
d. Bone Meal:
High in phosphorus, bone meal can be sprinkled sparingly, about a cup per cubic yard of compost, to enhance phosphorus levels.
7. Using Starters and Fertilizers for Best Composting Methods
7.1. Proportion and Mixing:
When adding starters or fertilizers, it’s important to evenly distribute them throughout the compost material. This can be done by layering these additives as you build your compost pile or gently mixing them into existing compost.
7.2. Balanced Approach:
While starters and fertilizers can accelerate decomposition and enrich compost, it’s crucial to use them in moderation. Overuse can disrupt the natural composting process and imbalance the nutrient levels in the compost.
7.3. Monitoring:
After adding starters or fertilizers, monitor the compost for changes in temperature, moisture, and decomposition rate. Adjust your composting practices accordingly.
Enhancing compost with starters and fertilizers is an effective way to speed up the composting process and improve the quality of the final product. By selecting appropriate products and using them in the right proportions, gardeners can create nutrient-rich compost to benefit their gardens significantly.
Conclusion on Best Composting Methods
Best Composting Methods offers a sustainable way to reduce waste and enrich garden soil. Each method caters to different needs, from small-scale indoor composting with worms to traditional outdoor bins. By understanding and managing the factors of time, temperature, moisture, and material balance, gardeners can efficiently transform waste into a valuable resource.
a. Companion planting for Asparagus
b. Companion Planting For Sweet Potato
c. Companion planting for Peas
d. Echinasea Companion planting